Moktar the Fox 2.0.2 documentation
-
The basics
-
Actually running the thing
First of all, unzip mtf202.zip into the same directory as your game
(I've used Titus the Fox here, but for Moktar it's roughly the same).
Then run MTF.COM. You should see something like this:
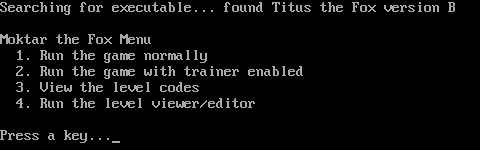
Here
you have 4 choices; just play the game, use the trainer, view the level
codes and run the viewer/editor. Options 1 and 3 should speak for
themselves.
Any other key just quits.
-
Trainer
While playing, you can press F5/F6/F7 to enable/disable the 3 features
of the trainer, being unlimited health/unlimited lives/noclip mode.
With noclip mode, you'll be able to move unhindered by walls and
gravity; enemies will still throw you around though. Also, the deadly
tiles are still deadly, even if you can pass through them.
Note that there is no indication when you press F5-F7; a future version of MTF will improve that mess.
-
Level viewer/Editor main menu
The menu looks like this:
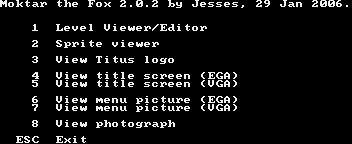
Option 2 shows you all the sprites used by the game, while 3-8 show some pictures.
Let's devote a fresh section to the remaining option.
-
Level viewer
-
What's there to see?
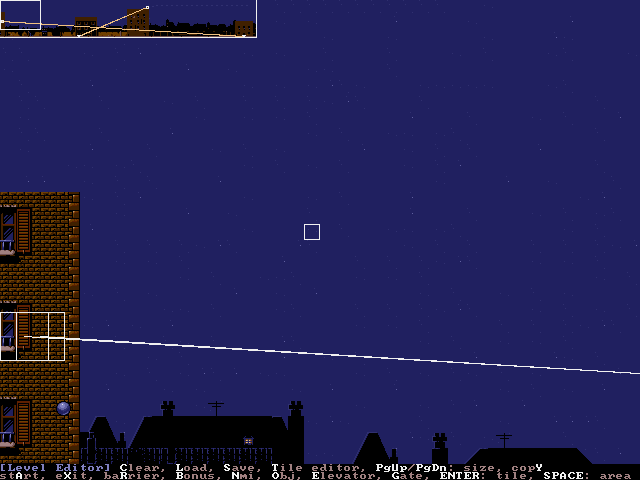
While the menu's options 2-8 are quite incredible indeed, we'll choose "1" this time. Now the level viewer is visible:
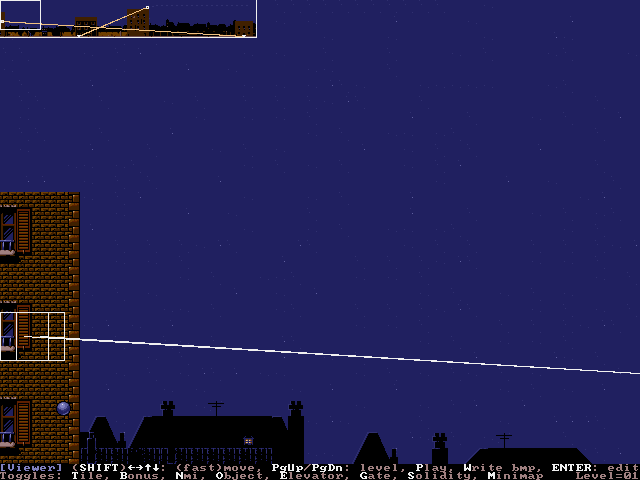
This
happens to be the very first level. At the bottom of the screen, you
can see a bunch of words telling you which keys ought to be useful.
The [stuff in square brackets] tells you where you are, WHITE UPPERCASE indicates what can be pressed and the rest is just some plain old text.
-
So, how does it work?
Try out the arrow keys, they're unbelievable!
Well, apart from that you could also try picking another level than the
first one via PgUp an PgDn, or just Play the level. "W" does not work
yet. We'll keep the mysterious "ENTER" command for later.
The toggle keys enable and disable display of certain things, just try
them out. And guess what that number at the end of the bottom row is?
When you have had enough fun with the viewer, Escape will bail you out.
-
Playing a custom level
-
Which level?
You managed to dig up a level file somewhere eh? Here's how to load and play it.
I'll use the demo level in this example. Download DEMO.LVL from the NEW LEVELS page and save it in your game directory.
-
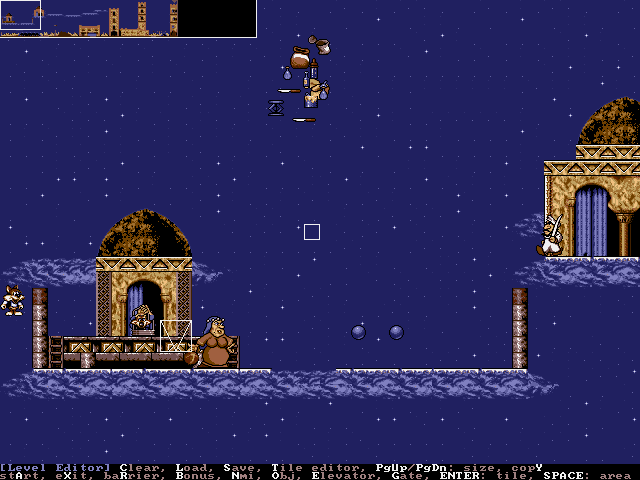
Loading it
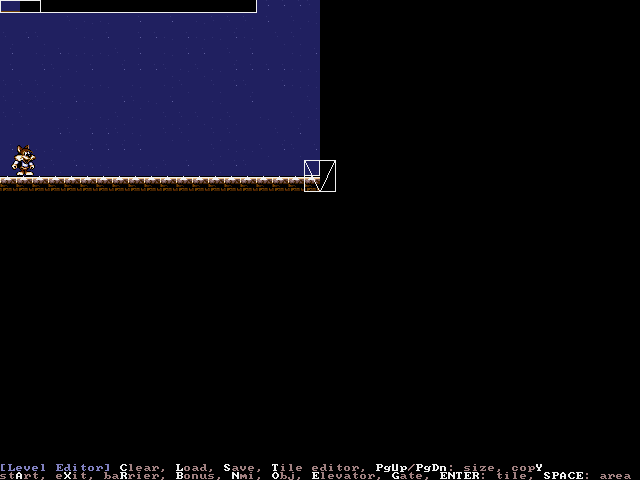
Open the level viewer. Since DEMO.LVL's preferred level is 11, press
PgUp/PgDn until you see this (note the "Level=11" on the right):
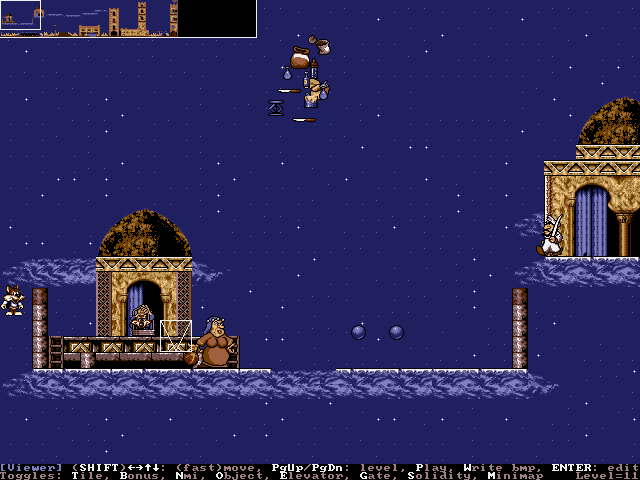
Now,
press ENTER. This opens the level editor, which I will explain later
on. For now, press "L" to load the level. At the prompt, enter
DEMO.LVL. Your screen should look like this:
and after pressing ENTER:
-
Time to play
Pressing Escape one time, we're back at the viewer:
Hit "P".
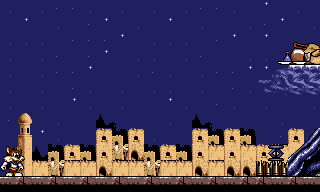
Take a walk!
-
Tutorial part 1: level background
-
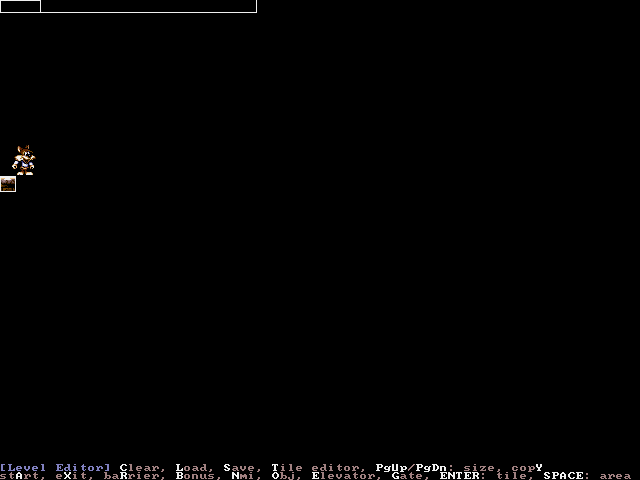
In the beginning
In this section I'll show how to make a level background from scratch.
We'll start by opening the level viewer. It will be handy to have
"Solidity" enabled, so make sure it is by pressing "S". At last, it's
time to press that illustrious key "ENTER".
I'll refer to the flashing thing as "cursor", since calling it "flashing thing" gets annoying and doesn't look professional.
One thing you should know, is that each level's background consists of
tiles, and each level has its own set of them. Let's take a look at
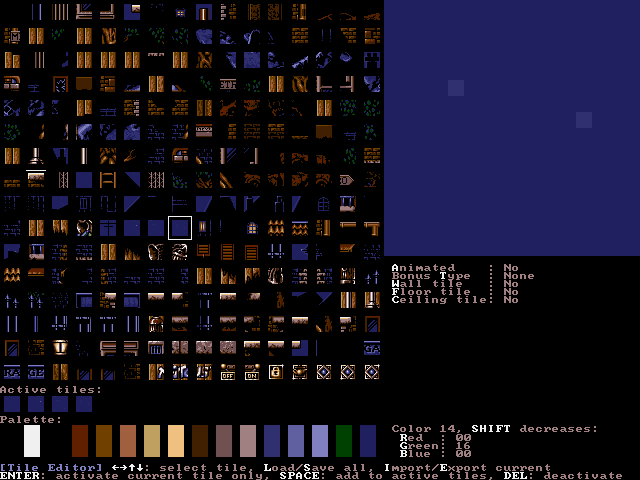
level 1's set: press "T" to open the tile editor.
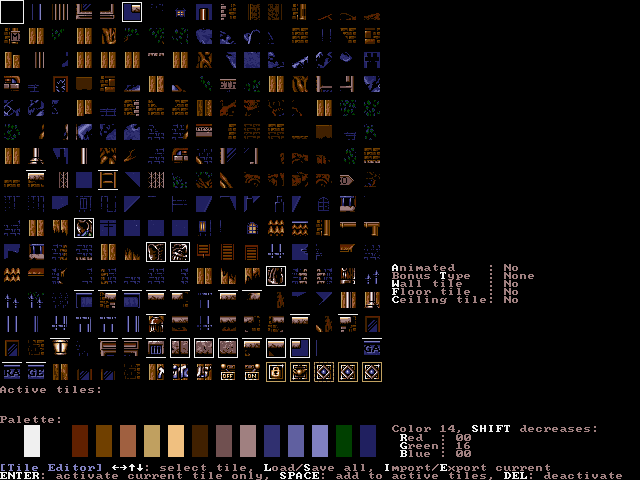
Because
we're going to clear the entire level, this set of tiles will also
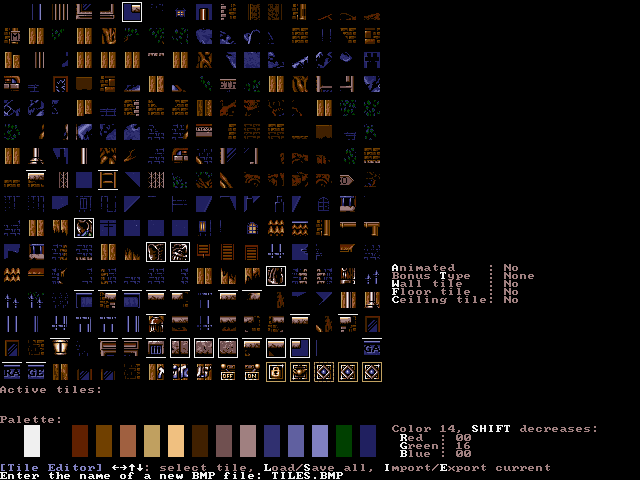
disappear. Let's save a copy to load back later. Press "S" and enter
"TILES.BMP".
After
pushing ENTER, press Escape to get rid of the "File written. Press a
key to continue..." message and press Escape a second time to exit the
tile editor.
It's time to dispose of level 1! Press "C" and confirm by pressing "Y".
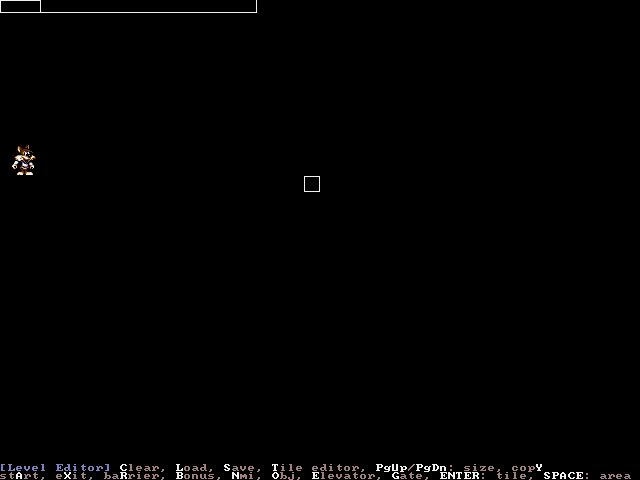
This
is not a very good level to upload, so let's make it a bit more
interesting. But first we have to load a set of tiles, so enter the
tile editor again by pressing "T"; you'll see all the tiles have
vanished. To fix that, press "L" and enter "TILES.BMP" at the prompt.
Now your screen should look almost like the tile editor did before,
except those lines around some of the tiles are gone.
-
Creating a level floor
"Those lines" around the tiles actually indicate what kind of tile it
is. If no lines surround the tile, which is the case for all of them at
the moment, the player will just fall through the tile.
Let's create a tile that serves as a floor. Select the tile indicated
in the screenshot using the arrow keys. Now, press "F".
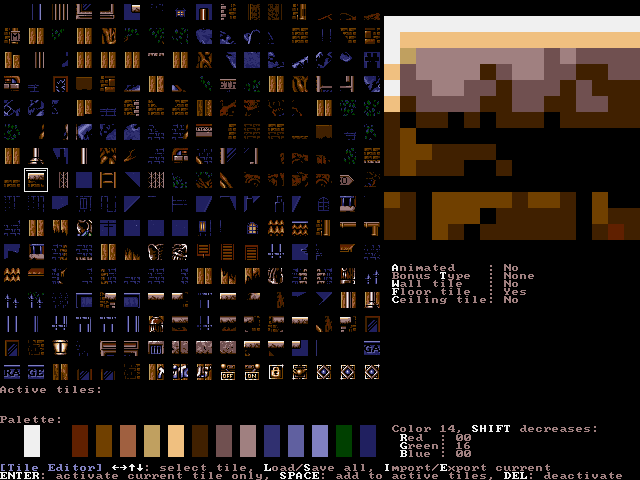
Notice that a line appears above the tile and at the same time the "Floor tile" on the right changes to "Yes".
Now we're going to place this tile in the level. Press ENTER to select it; you should see it appear under "Active tiles:". Press Escape to quit the tile editor.
Use the arrows to move the cursor as far leftwards and downwards as it will go. Then, press ENTER to place our floor tile.
Notice
the small white arrow near the top of the tile, which shows that the
tile's a floor; you can't go against the arrow's direction. If you
can't see the arrow, you probably don't have Solidity enabled, Just
press "Escape", "S", "ENTER".
One floor tile is a bit boring, so
let's make a whole row of them. Press the right arrow and ENTER. Press
right again and ENTER. And again. A bit tedious, not? Well, there's a
better way to fill an area with tiles.
Move right once more. Now, press SPACE. Move right until the screen starts to scroll.
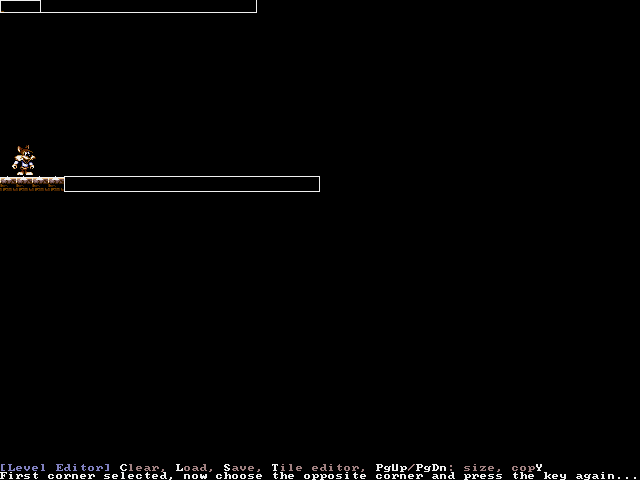
Let's
"press the key again": hit SPACE. Wow! a whole row of floor tiles. Note
that the SPACE command isn't limited to rows of tiles, rectangles can
also be filled.
After all this hard work, let's see how
it looks in the game! But first, we should place a level exit.
Fortunately, the cursor already is at a nice exit spot, so we'll place
it here. Press "X" to place the exit.
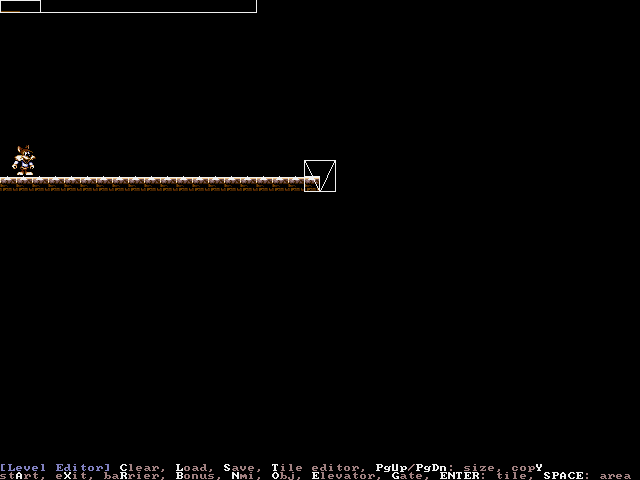
Alright, let's find out how difficult this level really is. Leave the editor with Escape and press "P"!
If you survive the long and hard journey to the level exit, you'll notice the game quits and puts you back at the level viewer.
-
Building the sky
Let's replace that blackness with a proper sky. Of course, you could
just repeat the floor tile select-and-place procedure, but that would
result in a sky consisting of one tile, which is going to be one color
only or look quite ugly. We'll make a starry sky like the ones in the
original levels.
Fire up the tile editor and use ENTER to select the blue tile to the
right of the floor one, it'll turn up in the "Active tiles" section.
Now move to the first of those 3 starry sky tiles and hit SPACE: it
will also appear under "Active tiles", but won't replace the tile
already there! Use SPACE on the other 2 star tiles too.
Now
there are 4 active tiles. What good is that? Escape out of the tile
editor. Move the cursor to the upper left, press SPACE, move it to the
right near the exit, just above the floor, and hit SPACE again.
The
area is filled just like we did for the row of floor tiles, but this
time it's not filled with one tile only. What happens is that on every
attempt to place a tile, one is randomly selected from the active tiles.
-
What can the tiles do?
Move your cursor to the "RA" tile at the bottom-left. Press "F" until
you see "Floor tile: Dropdown" on the right. Press "C" once, you'll see
"Ceiling tile: Yes". Move one tile to the right and repeat setting
Floor to Dropdown and Ceiling to Yes.
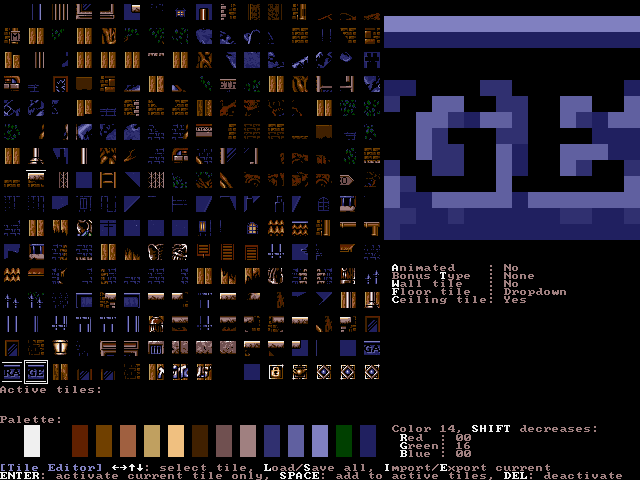
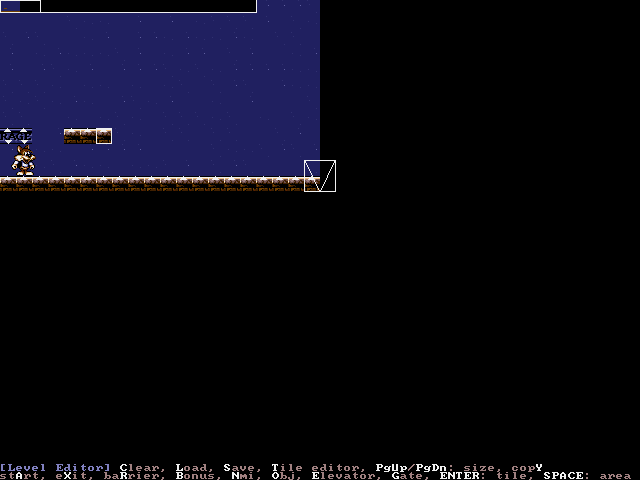
Now
hit ENTER to select the "GE" tile. Escape, put it directly above Titus.
Return to the tile editor, select "GA", leave, put it to the left of
"GE". Tile editor, select the floor tile. Leave, place 3 floor tiles a
bit to the right of "GE". This is what you should see now:
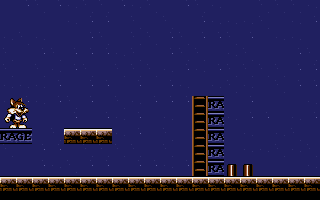
Try
playing the level again (press "Escape", "P"). You'll find it's
impossible to jump up through the "RAGE" tiles (because they're
"Ceiling" tiles), but the 3 floor tiles can be passed upwards. Now jump
on the "RAGE" and duck. You'll fall through after a short while; hence
the "Dropdown".
Let's return to the tile editor. Change
the floor tile's "Floor" to "1/8 Grip". Make the "RA" tile a wall now,
by pressing "W"; select it with ENTER afterwards. Return to the level
editor and place a stack of RA tiles somewhere on the floor; then play
the game once more.
Have fun sliding around, and notice that the wall is, in fact, a wall.
We've almost covered the basic tile properties now; get to the tile
editor and select the ladder tile (a bit left of the center). Change
both its Floor and Ceiling to "Ladder". Also, choose your favorite
dangerously looking tile and set its floor and ceiling to "Deadly".
Don't mind that there's a deadly 1, 2, and 3; just pick one.
You guessed it: place a ladder and a deadly tile somewhere and play to try them out.
There are 2 important tile properties I have not mentioned yet: I'll
leave "Bonus Type" for a later chapter, so let's discuss "Animated".
You probably know some of the original levels had animation in the
background, like smoke coming out of a chimney, rotating windmills etc.
With Animation you can achieve just that. The animations are only 3
frames long however.
Select the first tile of your 3-frame animation and enable its
animation by pressing "A". The next tile ("reading" left to right, top
to bottom) and the tile after that will become the 2nd and 3rd frames.
These tiles inherit the animation property from the 1st tile; placing
any three of them will result in animation.
In the tile editor, animation is shown by a dotted line around the tile. But, how does it look in-game?
To be continued...